The 10 Best Fight Scenes In Lord Of The Rings, Ranked
Peter Jackson's adaption of J. R. R. Tolkien's fantasy story "The Lord of the Rings" is rightfully considered one of the greatest film trilogies of all time. The story is epic in its depiction of the broad sweep of history and the movements of great armies, but at its core, it is about friendship and courage, and how even the smallest person can change the course of history.
But none of that would matter if the films were not absolutely thrilling. Each entry includes a number of standout action sequences. Ranging from small-scale skirmishes to the monumental clash of armies, these set pieces elevate the drama and quicken the heart. We've assembled the best of them and ranked them accordingly. One note worth mentioning: There is a difference between a fight scene and a battle sequence. For example, Helm's Deep is an enormous battle that contains several distinct fights. In this article, we'll be focusing on the best fights.
10. Gandalf vs. the Balrog
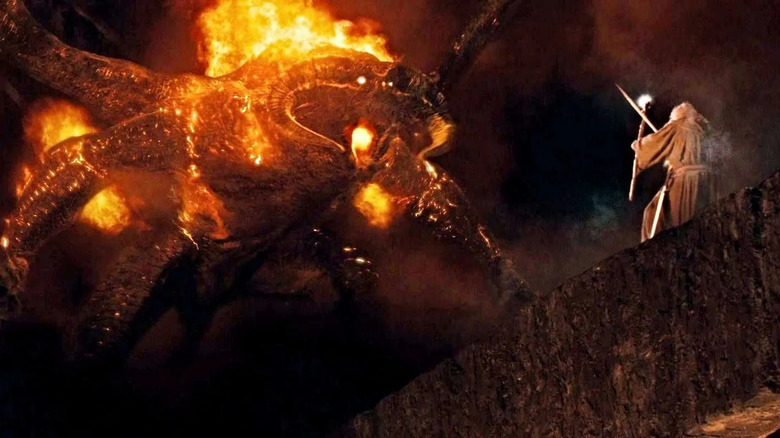
If you ask the average fan to name one of the trilogy's best fight scenes, chances are good that this one will be mentioned among the first few. It's iconic and memorable because the Balrog is an unforgettable foe. Oh, and Gandalf (Ian McKellen) dies. Briefly. But it's mostly a smoke and light show backed by incredible music.
The build-up has a lot going for it, as the Balrog pursues the Fellowship through the Mines of Moria. The only thing more terrifying than Gandalf's panic is the way the orcs flee when the Balrog rumbles in the distance. The heroes' flight is one of the tensest scenes in the entire trilogy as ancient stone columns crumble and orcs take potshots from the periphery. The group very nearly escapes but the Balrog catches them at the Bridge of Khazad-dûm, forcing a reluctant Gandalf to finally turn and face it.
What ensues is probably the showiest bit of magic in the films as Gandalf blocks the Balrog's whip with a shield and sabotages the bridge — but he doesn't really throw any punches of his own. We do get some of that as the two plummet into the unfathomable depths in "The Two Towers," but as it is, this one just noses ahead of Gollum (Andy Serkis) vs. the wriggly fish.
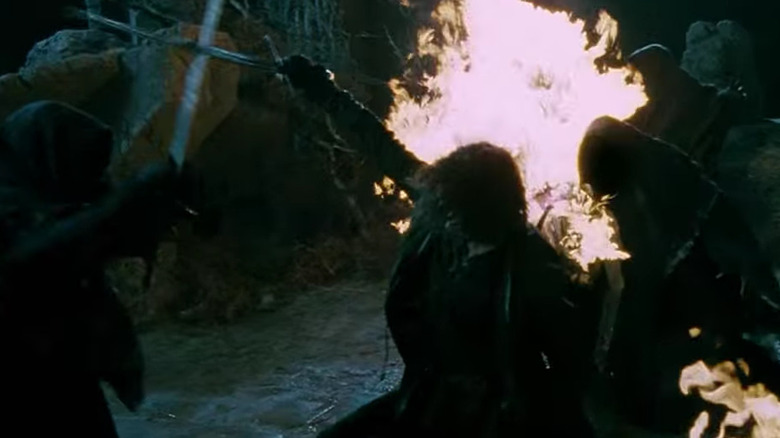
9. Aragorn vs. the Nazgûl
For all their oozing menace, the Nazgûl have some pretty glaring weaknesses. They have a paralyzing fear of both fire and water, which is kind of funny considering they are undead. I'm not calling them chumps, I'm just saying it's a good thing they have flying fellbeasts and that whole prophecy about being immune to men.
After striking out at Bree, the Nazgûl discover their prey at Weathertop thanks to an assist by the hobbits. They emerge from the shadows all wraith-like and make short work of the hobbits' inconsequential defense of Frodo. Before they can do much more than tenderize Frodo a bit, Aragorn (Viggo Mortensen) leaps from the shadows. Aragorn does a lot of heroic things in these movies, but going 1v5 against a group of immortal death knights has to be one of his most impressive feats.
Brandishing the hated fire, he drives them back from whence they came, or at least down the hill. Humorously, one Nazgûl — presumably the dummy of the group — sticks around long enough to take a torch to the face. It's a short fight, dripping with atmosphere and mood, but a little lackluster compared to other fights in the films.
8. Rohan vs. Warg Riders
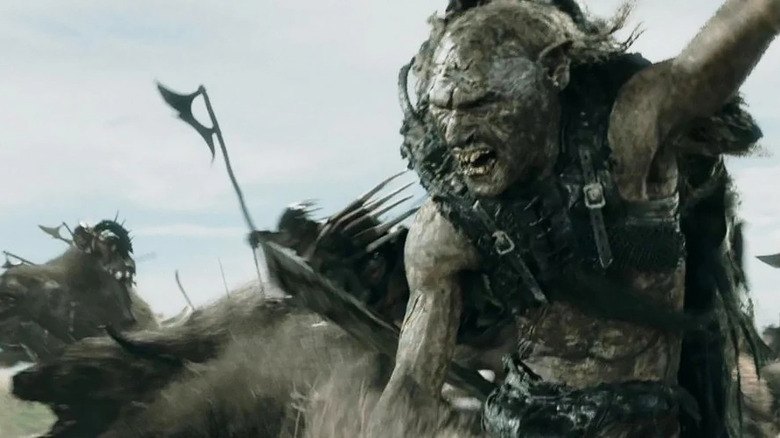
This fight scene is a true rarity. Though the films have plenty of fights where some of the characters are riding a horse, this is the only one where everyone on both sides is mounted. The chaos meter is, therefore, turned up to 11, as the mounts themselves become terrible bludgeoning weapons. The actors took serious hits out there!
"The Two Towers" sees King Théoden (Bernard Hill) escort his people to their ancestral panic room, Helm's Deep. There they intend on waiting out the Uruk-hai threat behind stout walls. Saruman (Christopher Lee) gets wind of the plan and sends out roving packs of warg riders to harry the column of refugees. Legolas (Orlando Bloom) kills an orc scout — but not before the orc's warg eats the face of a Rohirrim. A tide of slobbering wargs crests a distant hill. Legolas starts picking them off with his bow, but even if he had the time, he'll run out of arrows before he can kill them all.
The Rohirrim — along with our heroes — charge the enemy cavalry. The forces collide with bone-shattering momentum. Rides and mounts fall on both sides. The battle becomes a chaotic blur of hand-to-hand combat as mounts spin and charge once again. It ends when Aragorn is dragged over a cliff after he becomes entangled with a warg and the animal is too stupid to stop running before it's too late.
7. Eowyn vs. the Witch King of Angmar
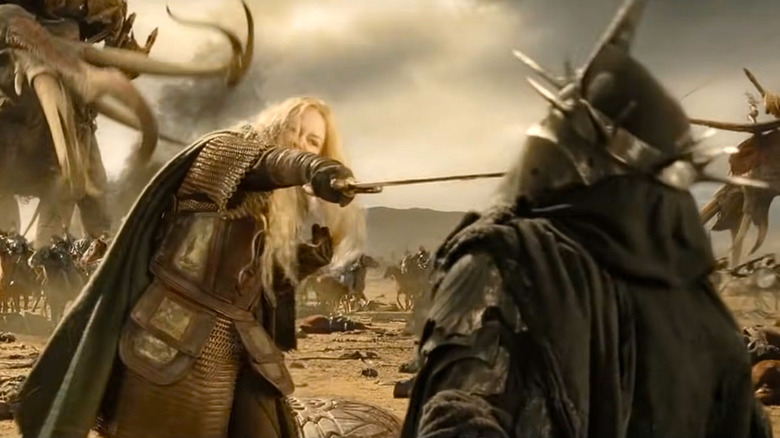
The fact that one of the most incredible scenes in the entire trilogy slots in at number seven is a testament to the embarrassment of riches in these films. After King Théoden is laid low by a fellbeast, his niece Eowyn (Miranda Otto) steps in before the creature can turn the king into supper and beheads the flying serpent.
The Witch King calmly rises from his dead mount. He starts whipping around a spiked flail that looks like it weighs at least 100 pounds. Eowyn manages to dodge the ponderous weapon several times, but it finally catches up with her. Her shield shattered and her arm broken, and the Witch King grandstands a bit. He picks her up by the throat and taunts her, saying, "No man can kill me." Famous last words.
Distracted, he doesn't notice Merry (Dominic Monaghan) sneak up behind him. Merry plants a sword in the back of his leg. The Witch King falls to his knees. Suddenly free, Eowyn removes her helmet and clarifies her gender, then plunges her sword into the Witch King's face. It's a powerful moment precisely because both Merry and Eowyn have been continually overlooked in favor of men. They aren't even supposed to be there, but in defying King Théoden's orders, they spared him a gruesome death.
6. Sam vs. Shelob
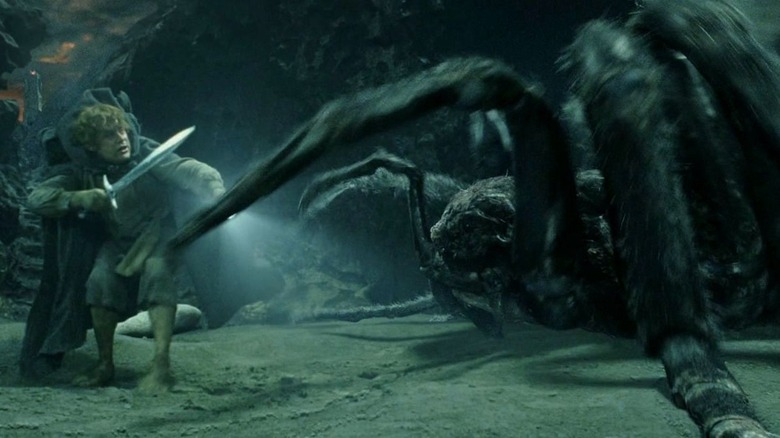
Maybe it's just me, but there are few things ickier than a giant hairy spider. Especially one that likes to wrap up humanoids to snack on later. It flies in the face of everything good and natural. After Gollum's betrayal, Frodo (Elijah Wood) manages to sneak out of Shelob's lair, but the giant spider is waiting for him. She stabs him and is in the midst of vacuum-freezing the body when Samwise Gamgee (Sean Astin) heroically emerges from the shadows. Holding Sting in one hand and the Light of Eärendil in the other, Sam rushes the bloated monster.
The ensuing fight is a real David and Goliath sort of battle. Sam is tiny compared to Shelob but he uses the light to daze the spider while his sword does its choppy-choppy stuff. Shelob knocks Sam off his feet and very cleverly kicks the light to the side, removing Sam's one advantage. No longer blinded, it bum-rushes Sam, driving him vertically up a wall as it tries to eat him. Eventually, it gets him on the ground and starts trying to stab him with its gross abdomen poker. But two can play that game. The stabber becomes the stabbee when Sam buries Sting in Shelob's abdomen. Shelob curls inward on itself — the spider version of a guy getting kicked in the crotch — and Sam drives the wounded creature into the shadows using the elven light. Front to back, the fight only lasts about a minute, but it is one of the most claustrophobic fights, and also the grossest one.
5. Boromir's last stand
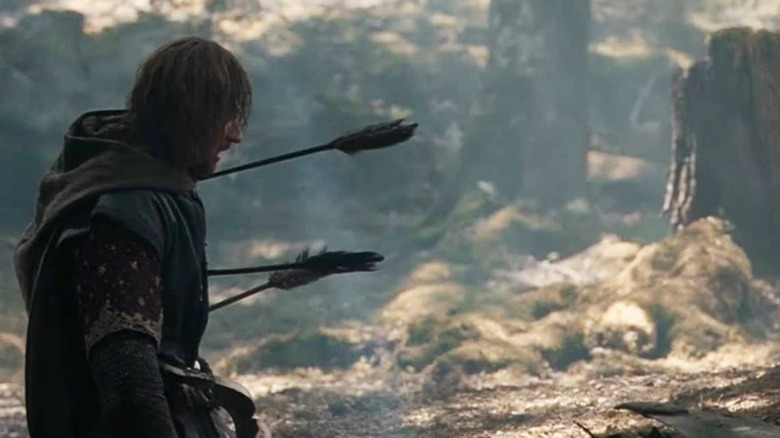
Let's be honest: For the most part, Boromir (Sean Bean) is a jerk. His googly eyes for the ring blinds him to the truth of it, and although he joins the "destroy the ring" party, it is done only grudgingly. Nobody is surprised when he finally decides to take the ring for himself and turns on Frodo, single-handedly shattering the Fellowship. The only time he's worth a darn is when there are enemies afoot. Fortunately, after his jewelry heist goes awry, he finally comes to his senses. The arrival of hundreds of Uruk-hai might have something to do with it.
Merry and Pippin lead the Uruk-hai away from Frodo in order to help him escape and end up trapped between two parties on a narrow stone bridge. All seems lost, and then Boromir leaps in front of the hobbits. Amid the parrying and slicing, he tosses a dagger into an Uruk-hai neck. He then starts blowing the Horn of Gondor, calling everyone toward him. He leads the hobbits on a fighting withdrawal but the Uruk-hai boss starts peppering him with arrows. Impossibly, Boromir fights on, even after he can only use one arm. But three arrows are about one too many, and the mortally wounded Boromir sinks to his knees. Merry and Pippin are captured, but his bravery ensures Frodo's escape.
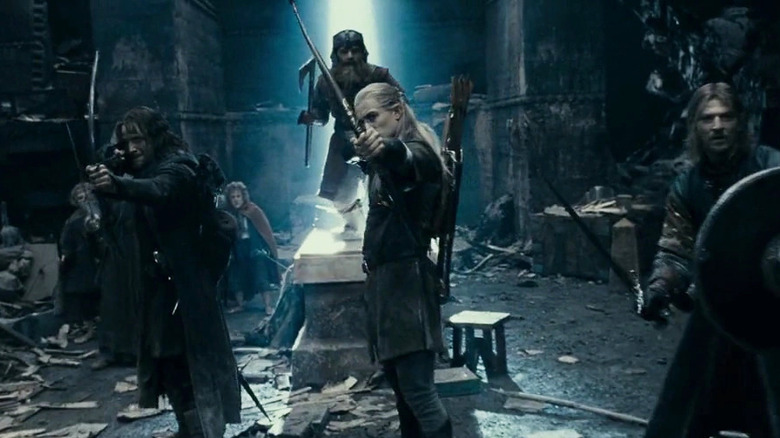
4. The siege of Helm's Deep
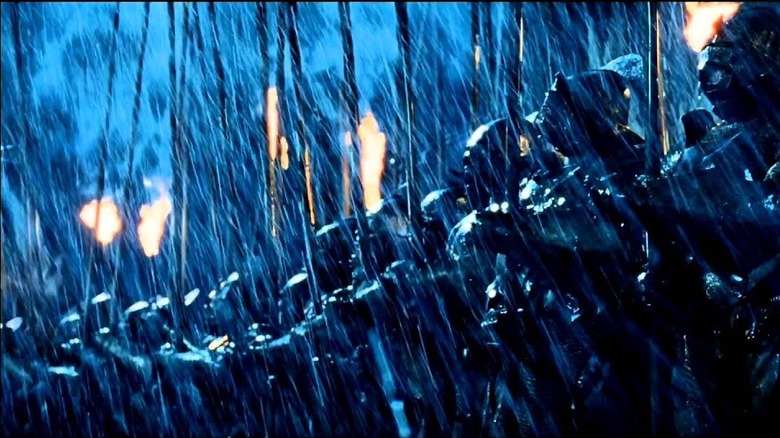
You knew this one had to be on here somewhere, right? The memorable scene is also director Peter Jackson's favorite sequence. The problem is the entire thing is like 30 minutes of runtime. It's a full-on battle comprised of many individual fights. There's the hand-to-hand combat atop the walls, Aragorn and Gimli fighting at the gate, the desperate fight in the breach once the walls come down, and the heroic ride out into the teeth of the enemy. Any of those moments are worthy of inclusion here.
The best thing about the siege is the build-up. The growing tension as the enemy draws near, the silence as the two forces face off. Even the rain adds to the atmosphere. My favorite moment is when the old archer loses his grip on the bow and accidentally shoots an Uruk-hai. The man's look of horror is priceless, as are the reactions of just about everyone else.
If I can pick only one sequence from this sprawling battle for inclusion here, it is definitely the initial Uruk-hai assault on the walls. There are so many Uruk-hai that every arrow the defenders fire is guaranteed to hit, and still, the enemy comes. Their siege ladders are a nasty piece of work, as are the armorless berserkers that ride the ladders to the top. The battle atop the walls is bloody, close-quarters work, but there is a sense the defenders can hold the line. And they might have, if only Legolas had brought down the suicide bomber.
3. Aragorn vs. all the Uruk-hai, at the same time
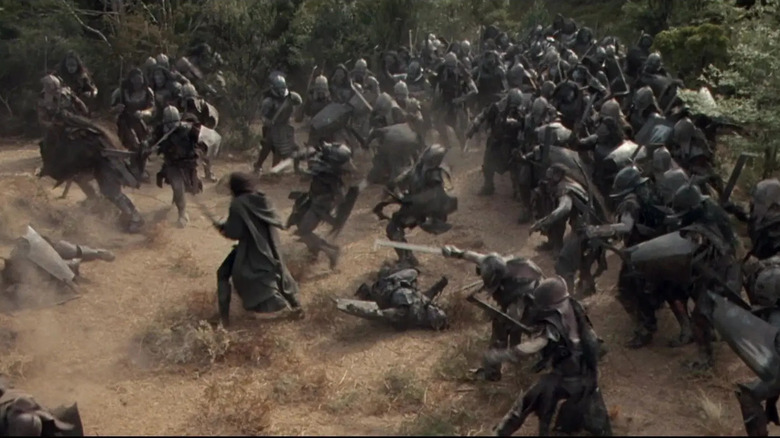
The end of "The Fellowship of the Ring" confirms without a doubt that Aragorn is the hero we all thought he was. Terrified after Boromir tried to steal the precious, a desperate Frodo straight up offers the one ring to Aragorn. Of the many battles Aragorn fights in the trilogy, this is his most difficult. The shadow of the ring has plagued him for years. He lives with the shame of Isildur's decision. We see the battle play across Aragorn's face, but in the end, he closes Frodo's hand and, with tears in his eyes, tells him he would've gone with him until the end.
Then he notices Frodo's orc-o-meter 3000 is glowing and all hell breaks loose. One of the single most awesome things you will ever see is when Aragorn steps from the ruins to face a teeming horde of Uruk-hai. He does not run despite the ridiculous odds. Instead, he salutes the foe with his sword and wades into their ranks. And though he says nothing, we know what he's thinking — for Frodo.
The Uruk-hai are like clone troopers: for every one Aragorn slices down, a million more are on the way (roughly). The frenzied battle rambles down the hillside and culminates with Aragorn's 1v1 fight with the Uruk-hai boss, who apparently is named Lurtz. The desperate, close-quarters fight sees Aragorn use his sword as a baseball bat, Lurtz uses a shield as a frisbee, and finally culminates with Lurtz showing Aragorn how to properly run himself through with a sword.
2. Balin's Tomb
The only fight scene in the entire trilogy that features the Fellowship at full strength is also one of the very best. Despite Gandalf's attempts to do anything but, the group decides to take the path through the mountain, via the Mines of Moria. Gimli (John Rhys-Davies) assures them of a warm dwarven welcome. Alas, everyone in Moria is dead. Midway through the journey, the group stumbles upon the tomb of Gimli's cousin, Balin. As Gandalf reads an account from the last survivors, Pippin (Billy Boyd) clumsily alerts everyone to their presence.
The orcs aren't long in arriving. The group barricades themselves into the tomb and takes defensive positions. Unseen orcs begin battering the door down. The defenders get off a few volleys of arrows and then the door splinters open. Orcs come streaming in. The Fellowship meet them head-on. The ensuing fight is bloody business, gritty and up close. Matters escalate quickly when a cave troll pushes through the door. It nearly crushes Sam underfoot, gives Boromir a probable concussion when it throws him into a wall, and destroys Balin's tomb as it tries to smash Gimli. In the end, it takes a group effort to fell the giant. A rousing, heart-racing fight from beginning to end.
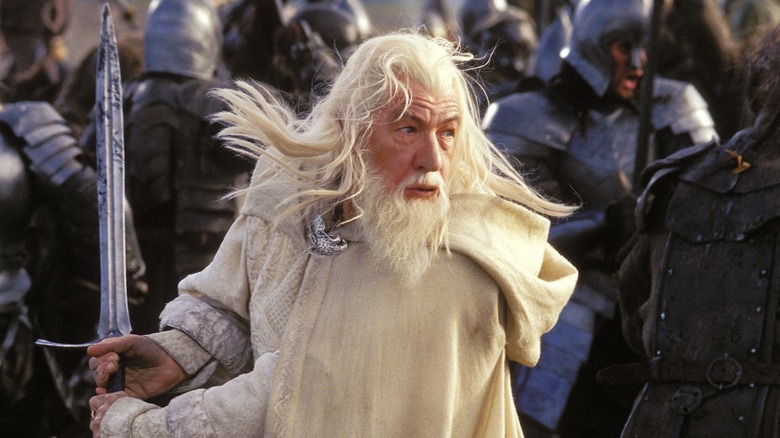
1. The charge of the Rohirrim (Pelennor Fields)

The Horse-lords of Rohan have a knack for showing up at the moment just before all hope is lost and tipping the matter decisively in favor of the good guys. They arrive at Helm's Deep in time to save a tiny remnant of survivors, including all of the named characters, and sweep the field of the Uruk-hai. Likewise, they arrive in Gondor's hour of greatest need. Rohan will answer. Just at the last minute.
Rohan finds the White City in flames and an uncountable enemy amassed on the field. As formidable as Rohan is, they are a fraction of the enemy force. Yet they do not flee. Much like the battle of Helm's Deep, it's the build-up that gives this fight scene its juice. King Théoden rallies the cavalry, riding up and down the line and high-fiving spears with his sword. Ever the eloquent one, he calls the charge: "Ride for ruin and the world's ending!"
There is a singular beauty to the charge. Orc arrows fall like rain. Horses and men crumble to the ground, but someone always gallops into the gap. The enemy falters, breaking at the moment before the wall of horseflesh slams into their ranks. And then the Rohan literally run them over, plunging deep into the enemy column. The sequence is one of majestic slaughter and the finest fight scene in the entire trilogy.